Heaven's Gate Technique
Introduction
In this article, we will examine one of the anti-debug techniques, Heaven's Gate. First we will explain this technique in detail and then we will analyze 3 simple crackme files. By the end of this article, you will understand what to do when Heaven’s Gate technique is encountered on IDA, x32dbg and WinDBG. We will also have a nice challenge at the end of this article :))
What is Heaven’s Gate?
Heaven's Gate is a technique to run a 64-bit process from a 32-bit process or a 32-bit process from a 64-bit process. This technique can be realized by executing a call or jmp instructions using the reserved selector. So, what’s the selector?
Segmentation is a memory management technique used especially in the x86 architecture. Special values that specify the segment to be used for memory access are called
segment selectors. The mode (32bit/64bit) in whichCS(CodeSelector) related operations will run is specified. If the value of theCSregister is0x23, operations are executed in32-bitand in64-bitif the value is0x33.
If a 64-bit process runs from a 32-bit file, the program will switch to the System32 subsystem and use the relevant dll files. Heaven’s Gate can be used when a 32-bit program needs to access 64-bit system libraries or interfaces that are not available in 32-bit mode.
In 64-bit windows, 64-bit system files are located in
%SystemRoot%\System32and 32-bit system files are located in%SystemRoot%\SysWOW64.
This technique is intended to prevent detailed analysis by the debugger. It is also intended to confuse the analyst. Known as the evasion technique.

Okay, the best way to learn is to practice. Our first file is an elf file. Let’s start analyzing it. Download here.
Crackme-1(IDA)
We see that the program is a 32-bit elf file. We also can’t find anything in the strings. When we run the program it shows us “Where is the secret message????”. We also can’t find anything in strings.
┌──(alper㉿nobody)-[~/Masaüstü/heavens_gate]
└─$ file heavens_gate
heavens_gate: ELF 32-bit LSB executable, Intel 80386, version 1 (SYSV), statically linked, no section header
┌──(alper㉿nobody)-[~/Masaüstü/heavens_gate]
└─$ strings heavens_gate
Where is the secret message???
┌──(alper㉿nobody)-[~/Masaüstü/heavens_gate]
└─$ ./heavens_gate
Where is the secret message???
Let’s try to open the program with IDA32 (I show the first program with IDA because it is easy to use and I want you to fully grasp the logic).
When we start to examine the program, we see that a far jump to a specific address is made at the beginning.

What we notice here is that the CS register is set to 33h and the jump is made. Since the CS register is set to 0x33, the operations at the jumped address will be executed in 64-bit.
Let’s continue the analyze by going to the relevant address.

When we jump to the corresponding address, we see that the instructions cannot be made sense of. When we jump to the address, we see that the instructions do not make sense. The reason for this is that the instructions at the address will be executed in 64-bit even though we examine the program in 32-bit with ida32. In this case we need to open ida64. Remember this:
ida32 can only analyze 32-bit programs, while ida64 can analyze both 32-bit and 64-bit files.
I open the program with ida64 and jump to the corresponding address again, but again I see that the code cannot be interpreted. This is because the program is 32-bit and ida analyzes the program accordingly. We need to analyze the instructions at the relevant address as 64-bit. For this we go to View -> Open Subviews -> Segments, right click on the segment and select edit segment. Set the segment bitness value to 64-bit and click OK.
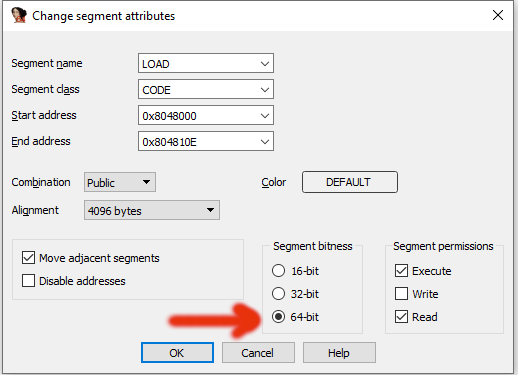
Then return to the address, select further from the address, right-click and have it analyzed.
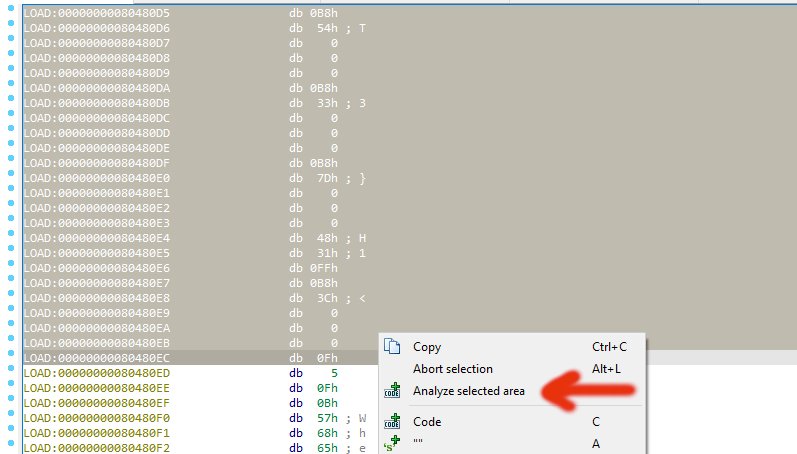
You will see that relevant instructions have been successfully analyzed.
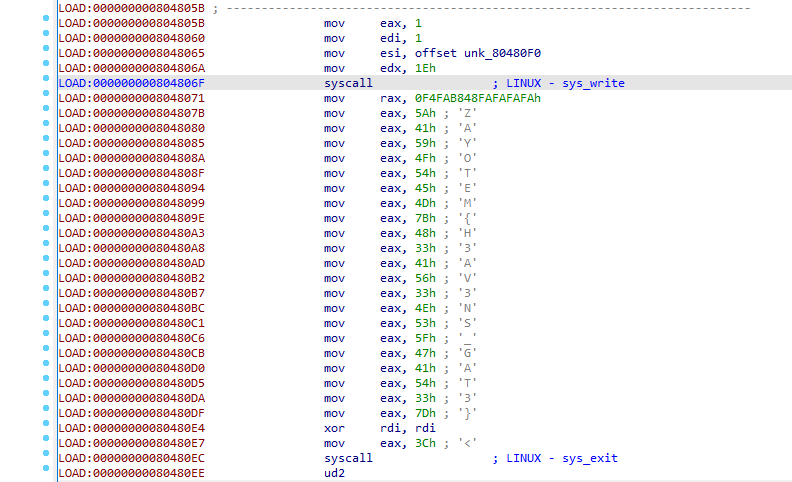
We have seen that the secret message is ZAYOTEM{H3AV3NS_GAT3}. You can review the code of the program here.
Now let’s move on to another example. This time we will use a debugger. Download here.

Crackme-2(x32dbg)
This example is a simple crackme file. When we run the program, we see that it asks us for a key.

We need to find the key. When we open the file with CFF Explorer, we see that it is 32-bit.

Open the file with x32dbg and go to entrypoint. click f9. You will be asked to enter to valid key. Go to the stack calls section. Right-click and click show suspected call stack frame and show active call stack frame respectively. Go to the relevant address by clicking on the last call.
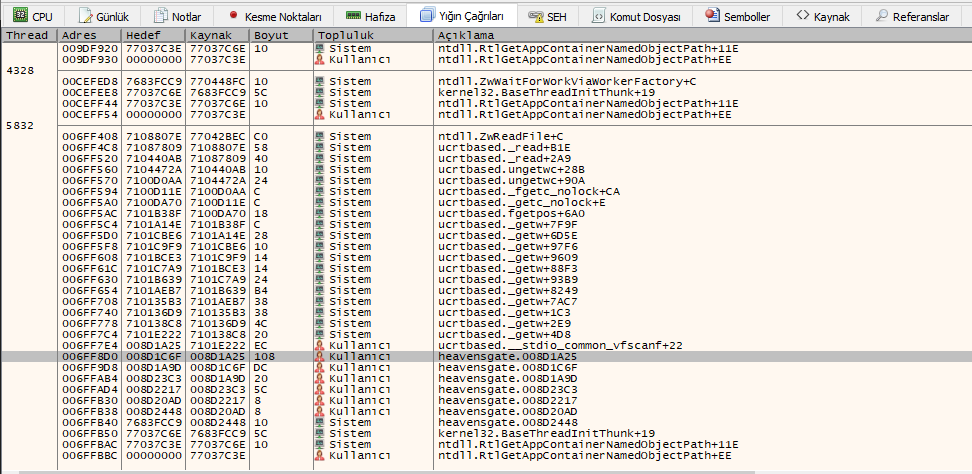
When we go to the address, we see the scanf call. Let’s put a breakpoint just below it and enter a key from the terminal.

Keep moving forward with f8. You will come to the following address.
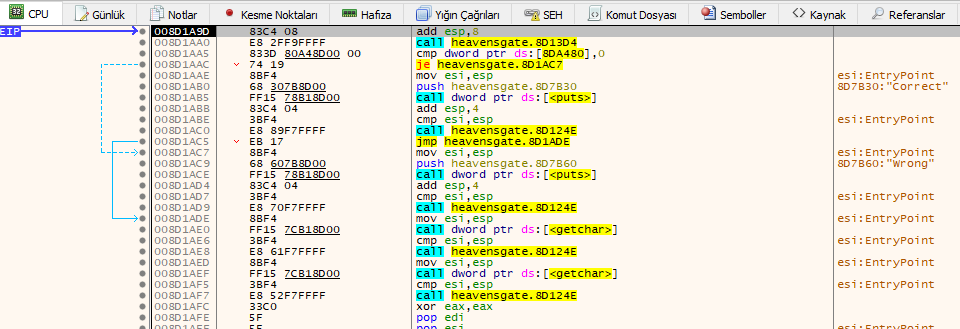
When we examine the instructions, we see that it compares the value at the 8DA480 address with 0 and if it is equal, it prints Wrong on the screen, if not equal, Correct!
There must be a control function at this point. This function appears to be located at address 8D1AA0. Let’s continue the analysis by going inside this function.
As we proceed step by step, we see that 7 characters of the password we enter are taken and moved to the registers.

We’ve come to the difficult part:
Let’s examine the picture above carefully. We see that 0x33 is pushed to the stack. Then we see that the call $0 instruction is called. So what is call $0?
The call $0 instruction actually returns the next address. let’s go ahead and execute the call $0 instruction. Look carefully at what happened.

We see that the ESP is pointing the EIP address. When we execute the current instruction, we see that 0x05 bytes will be added to the value pointed to by ESP. Click f8 and Follow the value of esp in the dump.
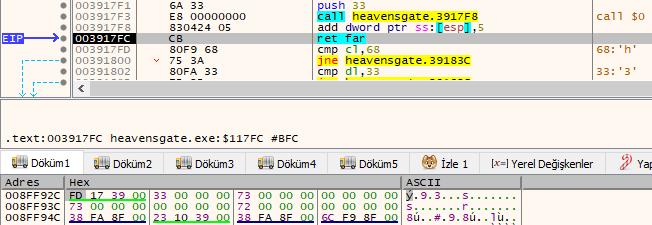
When we look at the dump, we see that the value of ESP is 003917FD. When the ‘ret far’ instruction is executed, this is the address to jump away from. Remember that 33 was pushed into the stack. So now code will run in 64-bit and we will not be able to continue the analysis with x32dbg.
At this point we need to continue with x64dbg. Open a 64-bit program on x64dbg and go to entrypoint. Copy the code to be executed with ‘ret far’ until the next ‘ret far’ instruction from binary->copy and paste it into the entrypoint in x64dbg from binary->Paste(Ignore Size).

Analyze it!
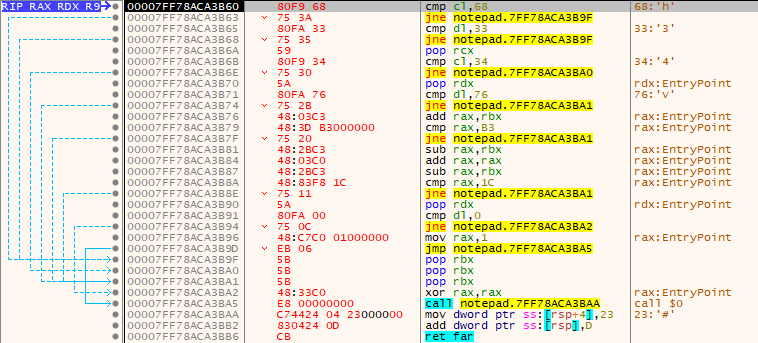
We see that the first 2 characters are h and 3. Then the value of size rcx is extracted from the stack and the rcx register is updated. Remember that the 3rd character of the password is pushed to the stack. Let’s remember the relevant field:
006917C0 | A0 76A46900              | mov al,byte ptr ds:[69A476]                              | 0069A476:"ssword"
006917C5 | 8A1D 77A46900            | mov bl,byte ptr ds:[69A477]                              | 0069A477:"sword"
006917CB | 8A0D 7AA46900            | mov cl,byte ptr ds:[69A47A]                              | 0069A47A:"rd"
006917D1 | 6A 00                    | push 0                                                   |
006917D3 | 51                       | push ecx                                                 |
006917D4 | 6A 00                    | push 0                                                   |
006917D6 | 53                       | push ebx                                                 |
006917D7 | 6A 00                    | push 0                                                   |
006917D9 | 50                       | push eax                                                 |
The 7th, 4th and 3rd characters of the password are pushed onto the stack respectively. The instruction ‘pop rcx’ will pop a 64-bit value from the stack. The ‘push 0’ instruction in between sets 32 bits. Thus, when the 64-bit system is switched to, the values can be extracted and set properly.
So we understand that the 3rd character is 4 and the 4th character is v. Then we come up with two equations. These are:
RAX + RBX == 0xB3
and
(0xB3 - RBX) + (0xB3 - RBX) - RBX == 0x1C so 2*0xB3 - 3*RBX == 0x1C
When we solve the equation, we find RAX is 69(E) and RBX is 110(n). We see that the last character is compared to 0. This instruction checks whether the string has been terminated or not. As a result we find the key as h34vEn.
Crackme-3(WinDBG)
We have analyzed this technique with x32dbg and IDA, but if we encounter a difficult use case we should use WinDBG.
WinDBG is the only debugger that can track WoW transitions and detect architecture changes.
You can download WinDBG here. Download the crackme file here. .
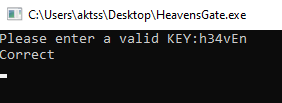
When we run the program, we see two messages.

OK. We need to find the flag. Open the crackme in WinDBG(x64) and set the WinDBG display.
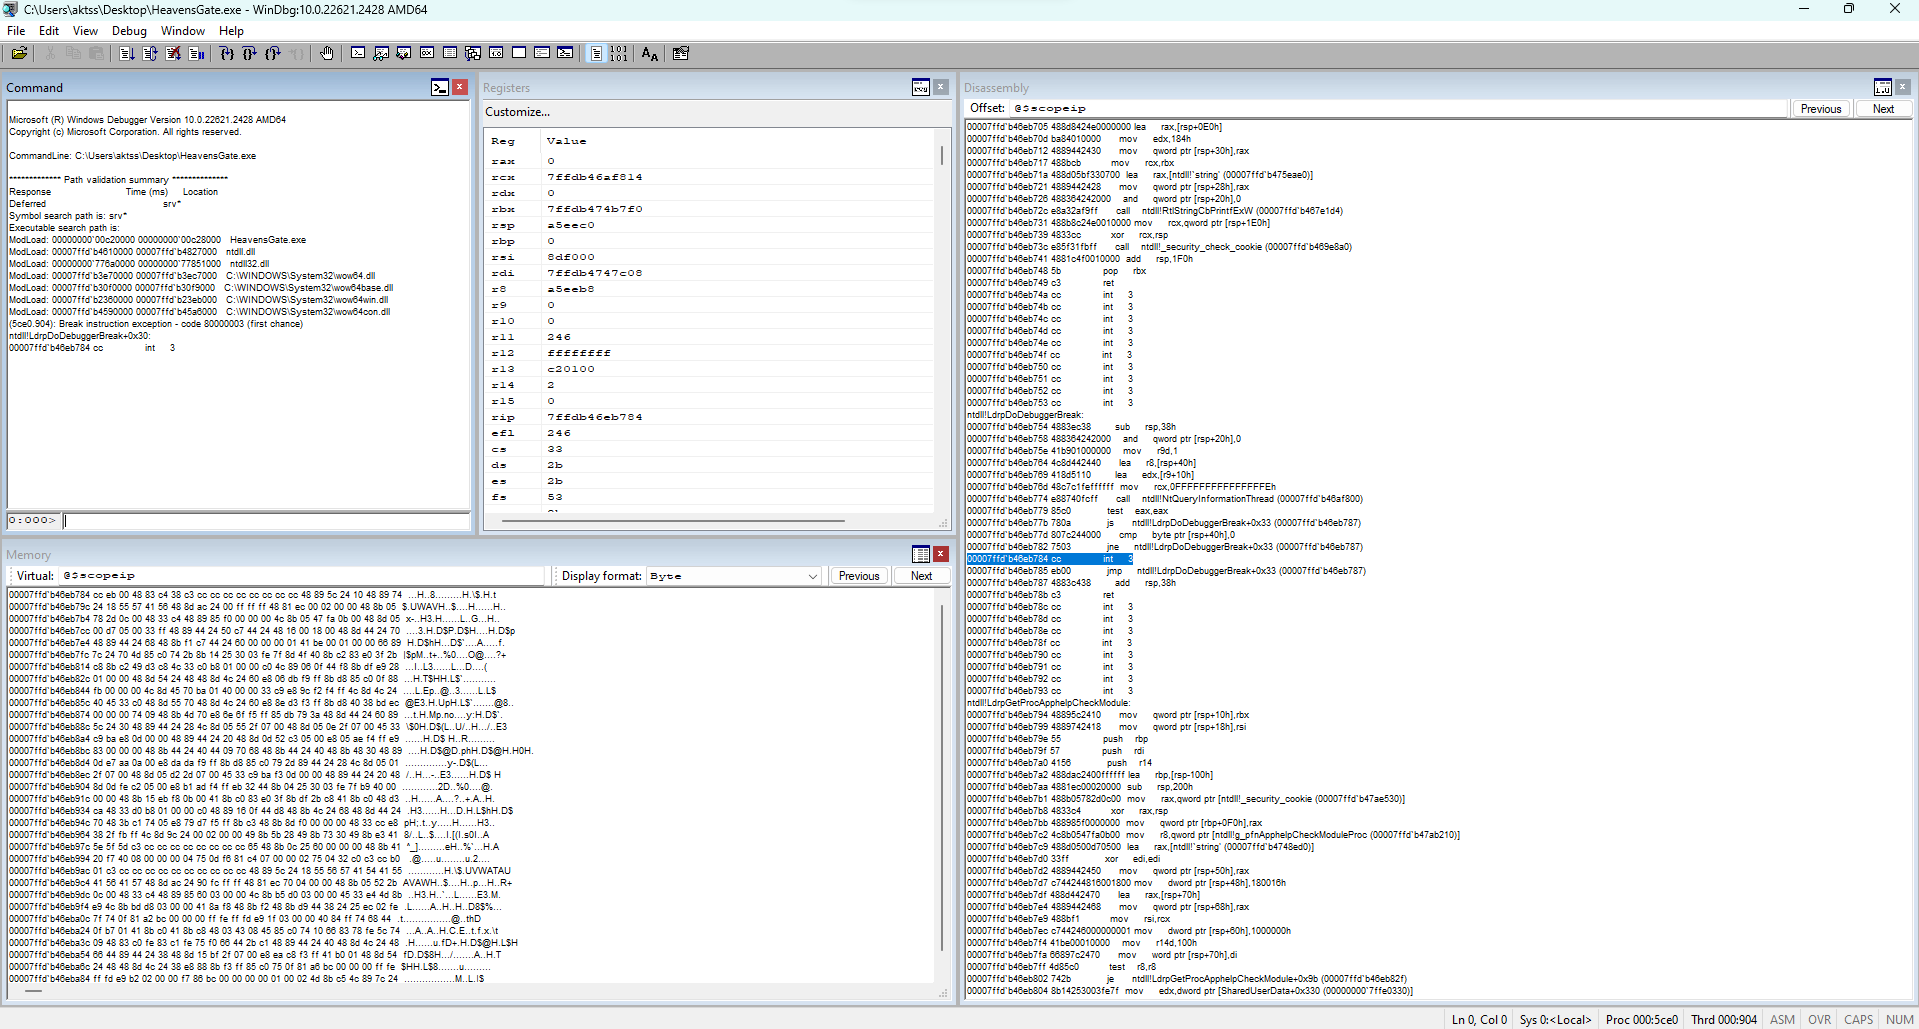
First load the program by clicking f5. Enter the command bp $exentry in the commands field to set a breakpoint to the entrypoint. Click f5. You are at the entrypoint.
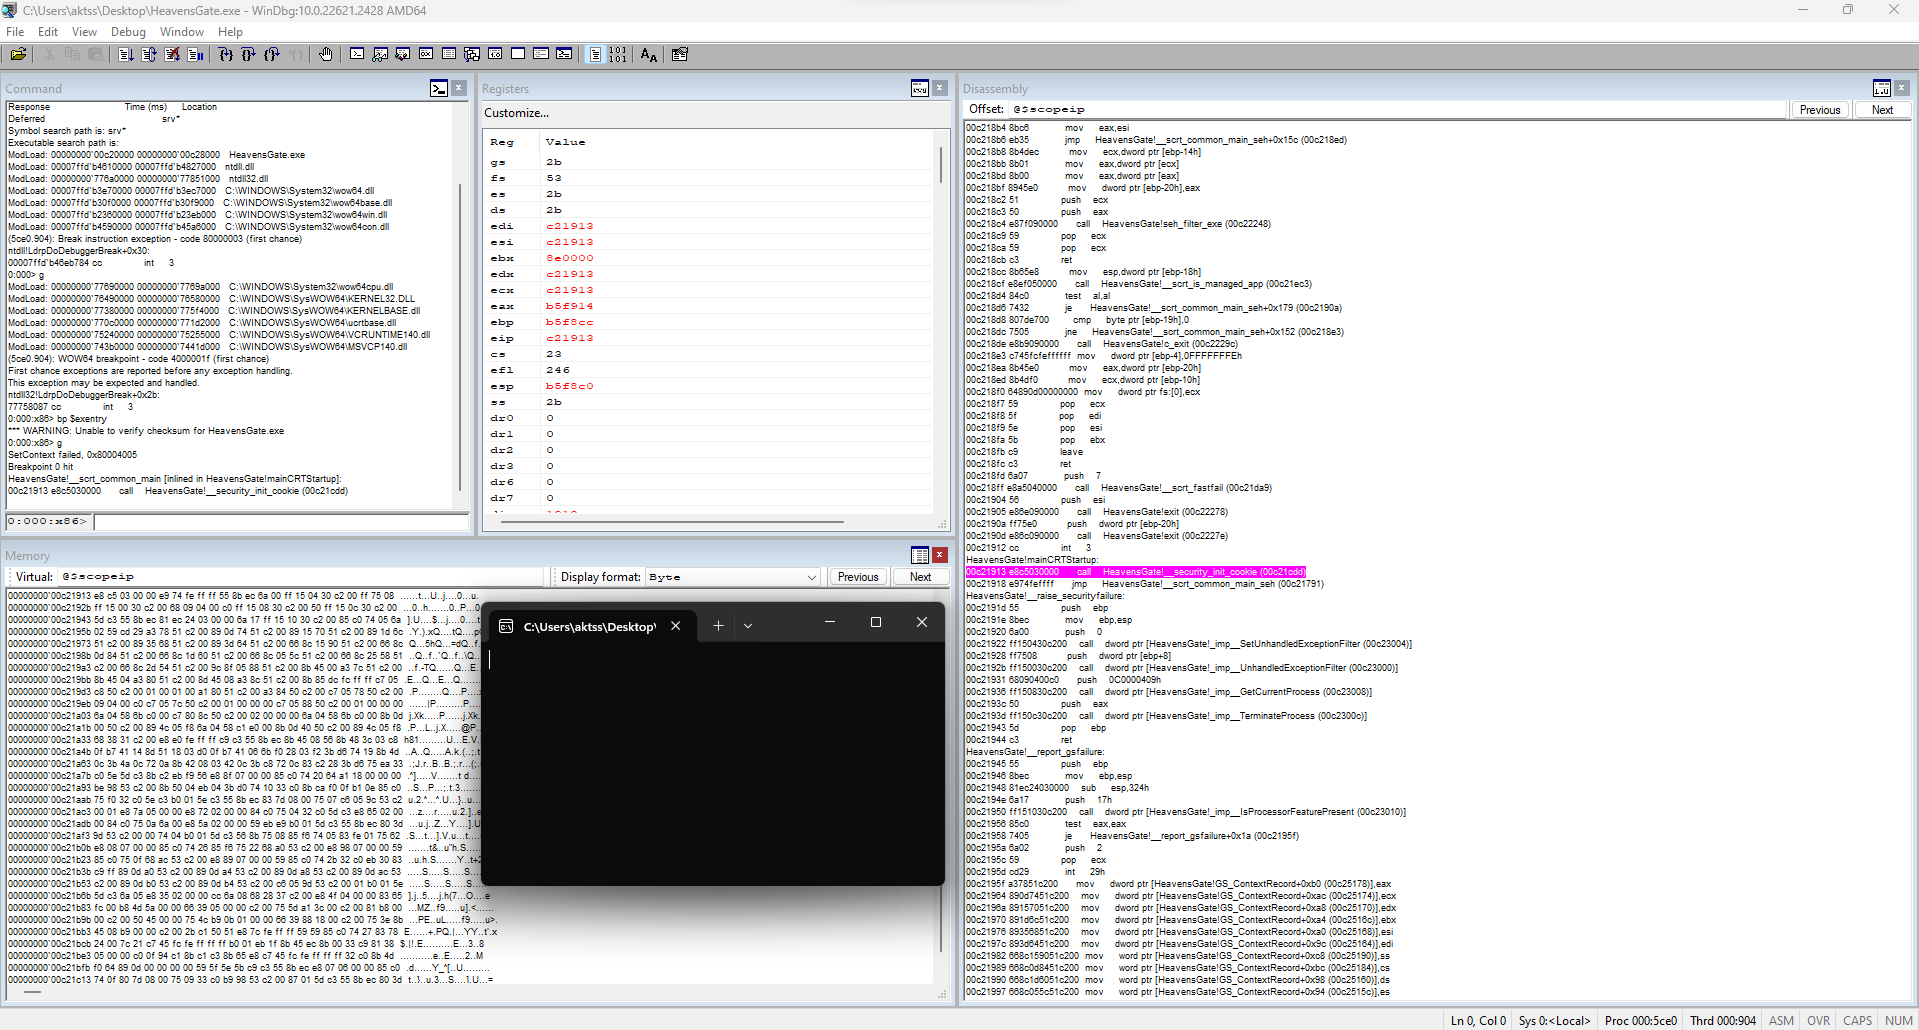
Go to the main function by pressing f10. When you get to the Main function, enter it with f8.
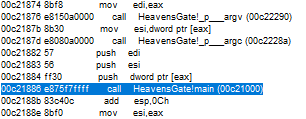
Once inside, analyze while moving forward with f10. We see the address where our first message is kept.

Go to the relevant address(00c23140) from the dump. You will see the first message.

Keep moving forward with f10. You will come to the far jump. We’ve talked about this place before so I won’t mention it again.

Check the registers before the far jump is made.
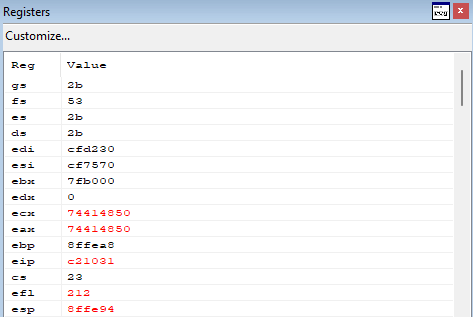
Click f10 and check the registers again.
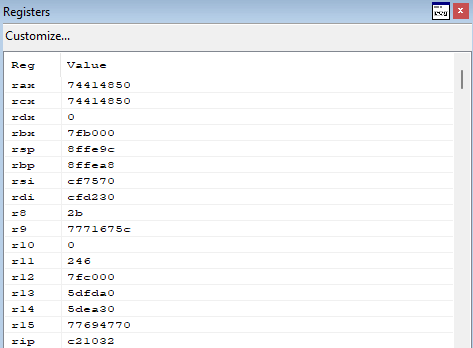
As you can see, the WoW transition was detected and the architecture changed.
Let’s keep moving forward. Examine the code carefully.
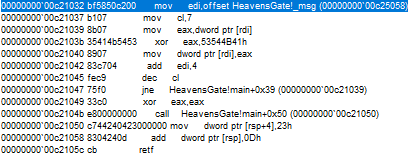
We see that the address of a message is moved to edi. After the cl register is set to 7, the first 4 bytes of the address value are moved to the eax register. This value is xor’d with 53544B41 and the value of the address in the edi register is updated. By adding 4 bytes to the edi register and decrementing the cl register by 1, these operations are continued in a loop.
Let’s go to the relevant address(00c25058) and check what’s there.

We see an encrypted message. That our encrypted message will be decrypted. Continue with f10 until you exit the loop.
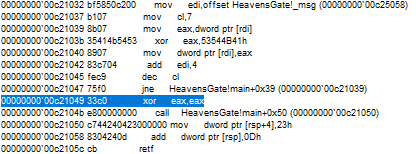
Check the value on the dump again.

We found the flag. ZAYOTEM{reverse_with_windbg}
Challenge!
I challenge you in the last part of this article! If you think you understand all this, accept the challenge and get the flag from the crackme here.
References
- https://sachiel-archangel.medium.com/analysis-of-heavens-gate-part-1-62cca0ace6f0
- https://www.malwaretech.com/2014/02/the-0x33-segment-selector-heavens-gate.html
- http://blog.rewolf.pl/blog/?p=102
- https://www.mandiant.com/resources/blog/wow64-subsystem-internals-and-hooking-techniques
- https://hackforums.net/showthread.php?tid=6261198