Code Signing With Certificate
Introduction
Malware developers are coming up with new techniques every day. In order to prevent these techniques, products such as AV, EDR, IDS/IPS are constantly developing and updating. There is a conflict and a race. And is there a definitive solution to these threats?
Of course, there is no definitive solution. However, checking the dijital certificate of an executable file is among the best options. This verifies the reliability and integrity of the file. Imagine you have a company. You only want to bring verified and reliable people into your company. You only want to bring verified and trustworthy people into your company. Otherwise, you may encounter a security breach.
What is a Dijital Signature
Dijital Signature is a type of electronic signature used to verify the integrity and identity of a file. Like a traditional handwritten signature, dijital signature are also placed on file. This verifies the identity of the file owner.
Dijital signatures are signed with a dijital certificate. When a file is signet with a dijital signature, the publisher information of the certificate used to sign the file is added as a dijital code signature. The dijital signature is created using the private key the code signing certificate stored on the certificate owner’s secure device.
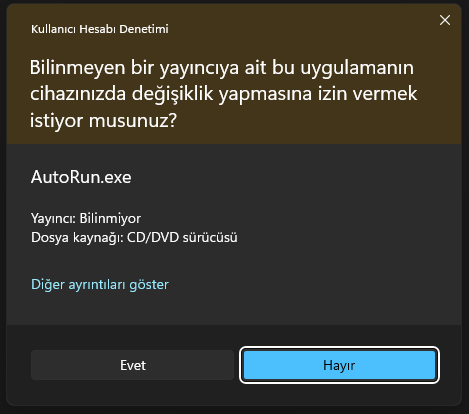
The operating system checks the code signing certificate when any executable file is opened. If the executable file can successfully confirm the publisher by passing the verification, it will be executed; otherwise, an unkown publisher warning will appear on the screen.
Valid Code Signing Certificate
You can easily create your own code signing certificate and sign your files on your local network. But this is only good for internal tests. If you intend to publish and distribute your files, you must use a code-signing certificate issued by a Trusted Certification Authority (CA). Other systems and browsers do not trust files signed with certificates created on the local network(Self-Signed Certificates). In this case, a reliable third-party application is needed.
Depending on the need, you can use third-party services that provide extended validation code signing certificates (EV Code Signing Certificates) or organisation validation code signing certificates (OV Code Signing Certificates).
How to Create a Dijital Certificate
We will follow 2 different methods to create a dijital certificate. We will use openssl for the first method. For the second method we will use powershell.
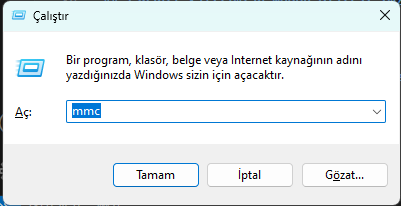
Open the Microsoft Managment Console (MMC) for a certification authority to see the existing certificate defined on the system before you create a certificate.
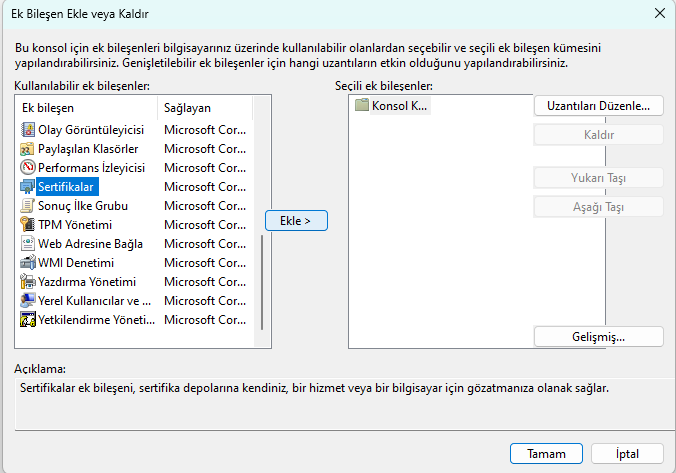
Select the certificate from File->Add/Remove Additional Component and select Computer Account->Local Computer and click OK.
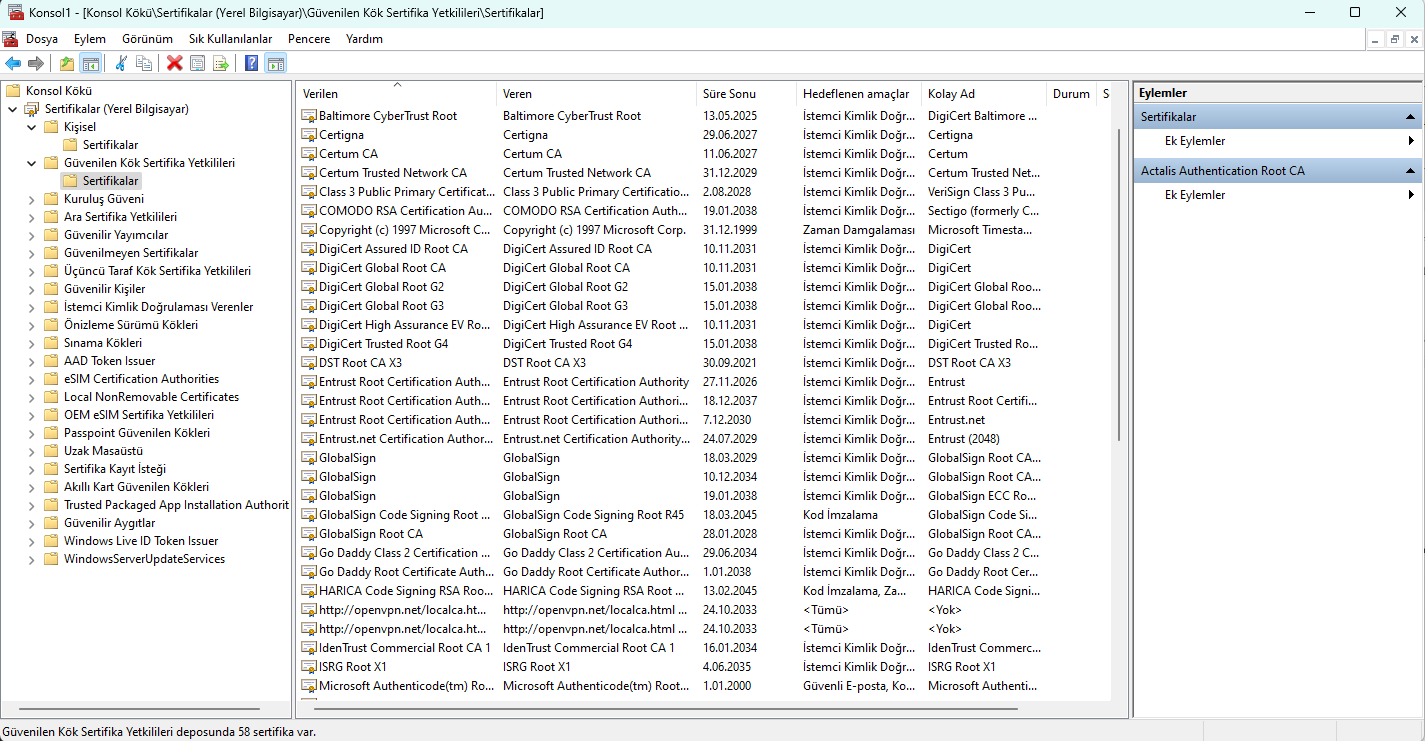
Go to Certificates->Trusted Root Certification Authorities->Certificates. In this section, you will see the certificates of trusted publishers in the system. The certificates in this section contain the public key and publisher information.
Asymmetric encryption is used in certificates. When we create a certificate, we will be given a crt file as a public key and a private key. Using our private key, we sign our file, and using the public key, we decrypt this signature to verify the integrity of the file and the identity of the publisher.
Let’s continue and view our certificate (localhost) in our local network from the Certificates->Personal->Certificates section.
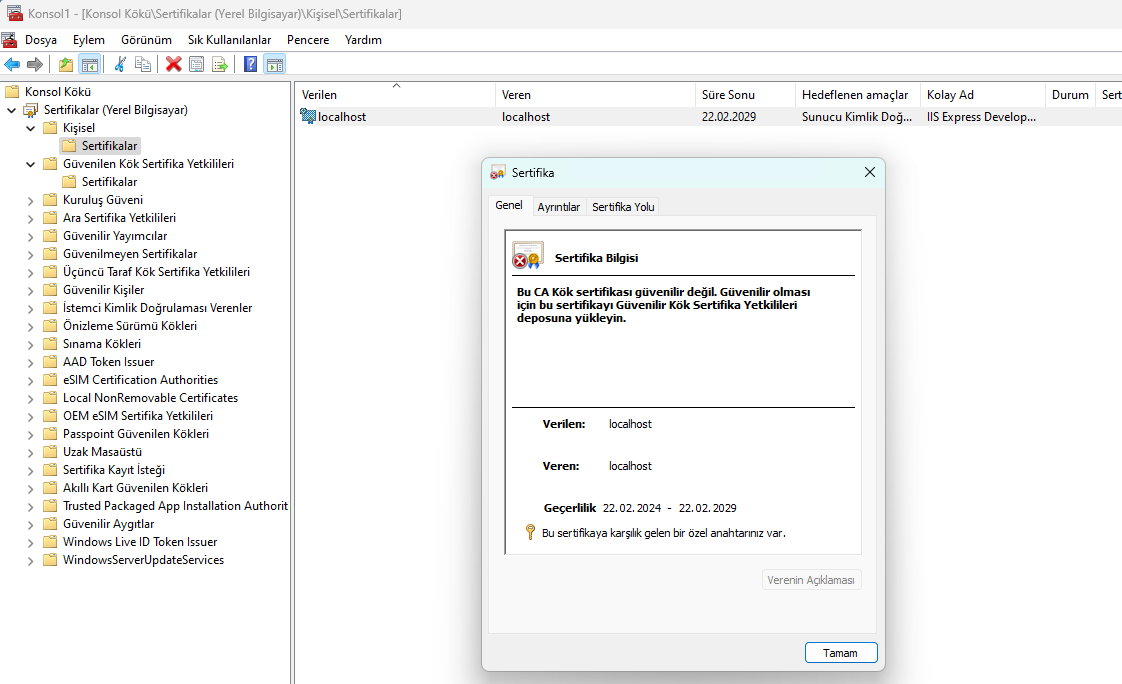
When we examine the certificate, we see that we have a private key. But now this certificate does not appear to be trusted. If we want, we can upload the certificate to the Trusted Root Certificate Authorities section and make the system trust the certificate. In this way, our files signed with this certificate are less likely to be perceived as a threat by the defender.

In the details section, we see that the sha256RSA algorithm is used as the signature algorithm. We also see the validity start and expiry dates of the certificate. These dates indicate when the certificate can be used.
Method 1 (openssl)
To obtain a certificate from a Certificate Authority (CA), you must have a certificate signing request file (CSR). A CSR file consists of the public key used in asymmetric encryption and some additional information about the issuer.
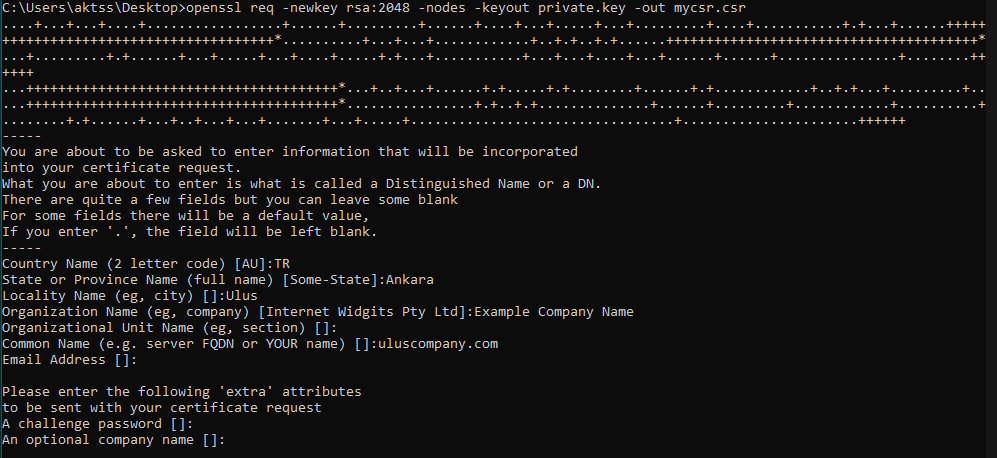
Use the command below to create our CSR file and key. This command gives us a private key (private.key) and a CSR file. You can fill in the additional information that you will be asked for.
openssl req -newkey rsa:2048 -nodes -keyout private.key -out mycsr.csr
With these two files we can now create our certificate (CRT). Create your self-signed certificate using the following command.
openssl x509 -signkey private.key -in mycsr.csr -req -days 365 -out mycrt.crt
We have successfully created our certificate. If we want, we can encrypt our traffic with this CRT file and make it HTTPS and make the communication reliable. Let’s keep moving forward for now.
To sign a file, we need a file with the PFX extension. A PFX file is created in accordance with the PKCS #12 standards (Public Key Cryptography Standards). This standard is commonly used to transport cryptographic material related to private keys. Files with the PFX extension contain the publisher’s digital certificates and private keys. In this way, we can easily sign our files. Let’s create the PFX file using the private key and our certificate file. When you run the command, you will be asked to enter a password. You can leave it blank if you want.
openssl pkcs12 -inkey private.key -in mycrt.crt -export -out mypfx.pfx
In this way, we have created both our CRT file to be used in the approval process of the files and the PFX extension file that we will use to sign our files. In order to verify the signature of the files signed with the relevant PFX, we need to add our CRT extension certificate as a Trusted Publisher. Use the following command for this:
certutil -addstore TrustedPublisher "mycrt.crt"
To add as a Trusted Root Certification Authority:
certutil -addstore Root "mycrt.crt"
In the next step we will analyse how to sign files.
Some additional commands.
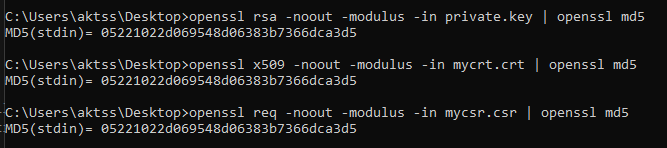
To verify whether the private key matches the certificate and CSR file:
openssl rsa -noout -modulus -in domain.key | openssl md5
openssl x509 -noout -modulus -in domain.crt | openssl md5
openssl req -noout -modulus -in domain.csr | openssl md5
To create a private key:
openssl genrsa -des3 -out domain.key 2048
To view information about the certificate:
openssl x509 -text -noout -in domain.crt
Method 2 (Powershell)
Although I prefer openssl to powershell, it may be necessary to use powershell in some cases. I would like to briefly mention powershell for these situations. You can find alternative commands to Openssl below.
To create a certificate, first determine the domain name and where it will be stored. I am writing the ip address to localhost for now.
$cert = New-SelfSignedCertificate -DnsName 192.168.1.121 -Type CodeSigning -CertStoreLocation Cert:\CurrentUser\My
After this step, run the command below to create a password for the certificate.
$CertPassword = ConvertTo-SecureString -String "" -Force –AsPlainText
Your certificate (CRT) will be added automatically. Use the command below to export the PFX file.
Export-PfxCertificate -Cert "cert:\CurrentUser\My\$($cert.Thumbprint)" -FilePath "d:\selfsigncert.pfx" -Password $CertPassword
If you already have a CRT file, you can import this certificate with the command below:
Import-Certificate -FilePath .\mycrt.crt -Cert Cert:\CurrentUser\TrustedPublisher
How to Sign Files?
We will use the SignTool tool to sign the files. You can download SignTool from here. Don’t forget to update the path variable.
Open Visual Studio 2022 and create a sample c++ project. After creating the project, compile it and open Tools->Developer Command Prompt on the top tab.
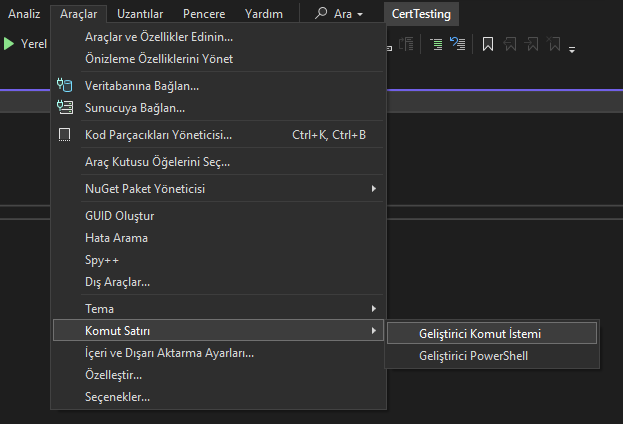
If you have updated the path environment variable, you should be able to run the tool successfully.
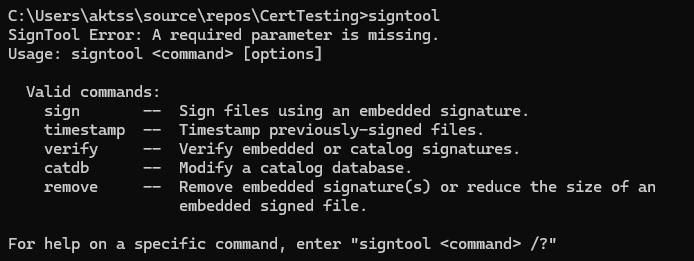
To sign the file, use the following command, properly entering the path to the relevant files:
signtool sign /v /f current_cert.pfx /fd SHA256 /tr http://ts.ssl.com /p secretpassword CertTesting.exe
- If you put a password to the PFX file, add the
/pparameter. - By adding a timestamp to the file with the
/trparameter, you indicate that it exists at a certain time. It can be used in cases where the certificate has expired so that the certificate can still be trusted. - You can specify the hash algorithm in the signing process with the
/fdparameter. Generally SHA1 and SHA256 are used. - If you want to get detailed output, use the
/vparameter.
After this command, our file will be successfully signed.
Code Signature Validation Process

When we sign the file with the PFX file containing the private key, the signed hash value of the executable code and the relevant certificate information are embedded in the file. When the code signature is to be verified, it is first checked whether the certificate information is defined in your system. If the relevant certificate is defined in your system, proceed to the next step.
The executable code of the file is taken and put into the hash algorithm and the hash value is generated. In the next step, the signed hash value in the file is taken, decrypted by the public key of the certificate and the hash value of the file code is obtained. In the last step, these two hash values are compared and if they are the same, the file is registered as trusted.
You can follow the relevant process from the diagram above.
The Threat of Leaking Digital Certificates
Malware authors use code signing certificates to show that the code comes from a trusted source. This technique is known as AV Evasion method. However, a file signed locally will not be trusted as its certificate will not be recognised on other systems. We mentioned that you can get a certificate from a third party certificate authority (CA) for such cases. So what are the threats if this certificate is leaked?
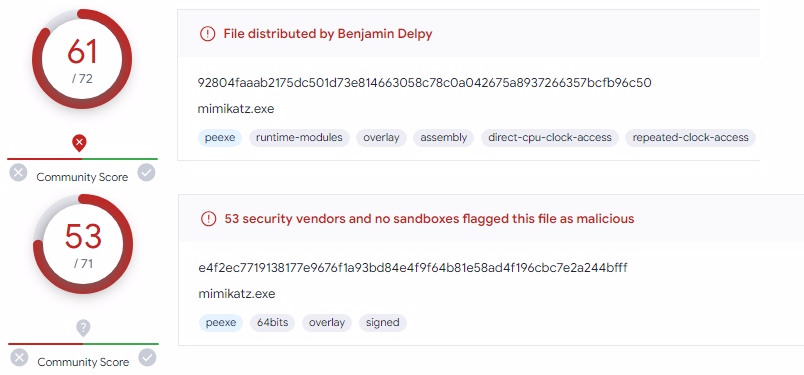
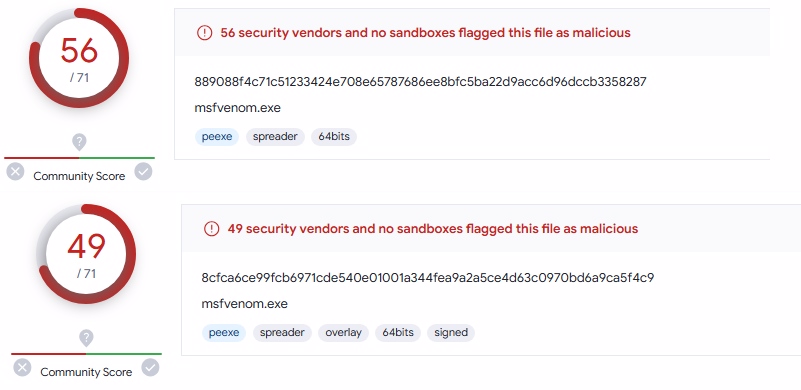
In the past years, among the data leaked from Nvidia by the group named LAPSUS$, there was also a code signing certificate. Later, these leaked certificates were used to sign malicious software. Although the certificates have expired, Windows deliberately allows expired certificates before 2015 so that driver support does not disappear. You can examine the before and after output of mimikatz and msfvenom files signed with this leaked certificate in virustotal below.
Mimikatz
Msfvenom
If you want to examine the related files, you can download here. Zip password: infected
Blocking Leaked Certificates and Creating a Yara Rule
Now that we have discussed the importance of certificate security, let’s look at the security measures that can be taken against leaked certificates.
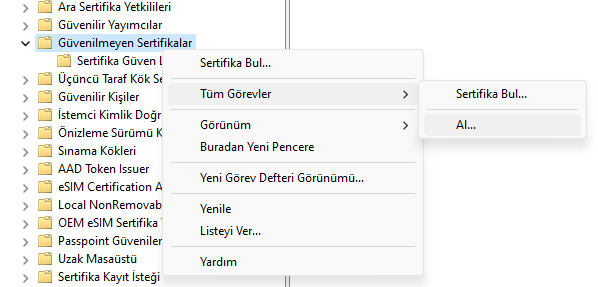
If you have a certificate that you think has been leaked, you can specify this certificate as an untrusted certificate in your system:
certutil -addstore Disallowed C:\Cert.crt
You can also do this using MMC by importing the certificate from the Untrusted Certificates section.
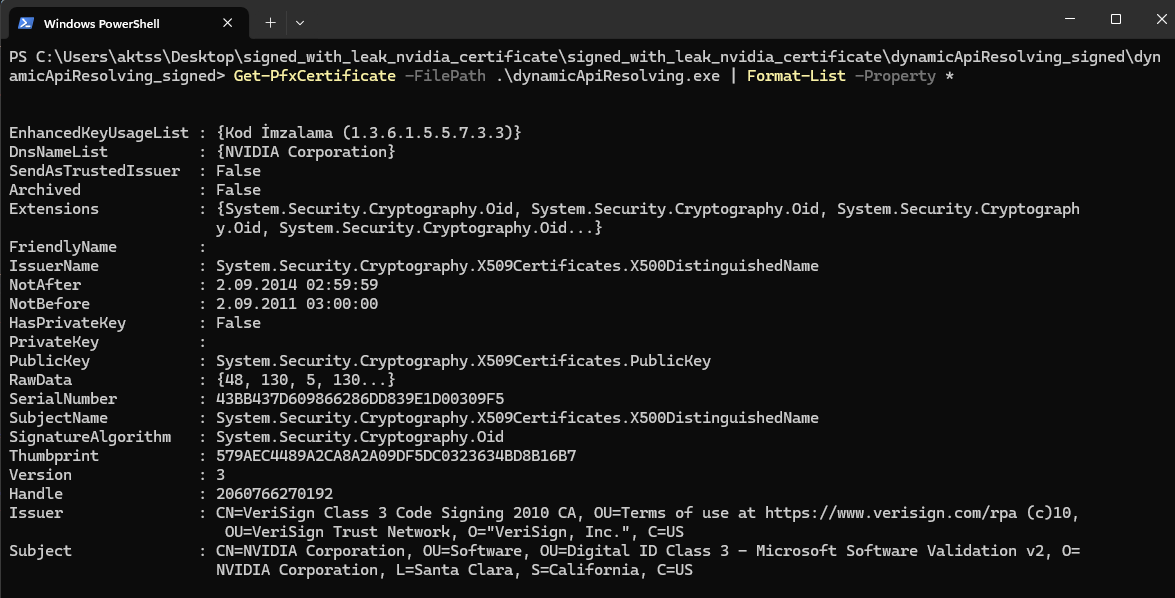
We have already mentioned that when a file is signed with a certificate, information about the certificate is stored in the file. If the file is leaked, a yara rule can be written about this information. Run the following powershell command to view the certificate information:
Get-PfxCertificate -FilePath dosya_adı | Format-List -Property *
You should get an output like the following.
You can find a yara rule prepared in the light of the relevant information below.
import "pe"

rule CompromisedNvidia {
   meta:
        description = "Detects a compromised nvidia certificate"
        author = "Alper Aktaş"

   condition:
      uint16(0) == 0x5a4d and
      for any i in (0 .. pe.number_of_signatures) : (
        pe.signatures[i].issuer contains "VeriSign Class 3 Code Signing 2010 CA" and
        pe.signatures[i].subject contains "NVIDIA Corporation" and
        pe.signatures[i].not_after == 1409615999 and
        pe.signatures[i].not_before == 1314921600 and
        pe.signatures[i].serial == "43:bb:43:7d:60:98:66:28:6d:d8:39:e1:d0:03:09:f5" and
        pe.signatures[i].thumbprint == "579AEC4489A2CA8A2A09DF5DC0323634BD8B16B7"
   )
}
Reference
- https://cheapsslsecurity.com/blog/code-signing-101-how-to-sign-an-exe-or-application/
- https://codesigningstore.com/how-to-sign-an-exe-with-a-digital-certificate
- https://cheapsslweb.com/resources/how-to-sign-exe-using-code-signing
- https://www.digitalocean.com/community/tutorials/openssl-essentials-working-with-ssl-certificates-private-keys-and-csrs
- https://www.sordum.net/52825/kod-imzalama-sertifikanizi-kendiniz-olusturun/
- https://www.nextron-systems.com/2018/11/01/short-tutorial-how-to-create-a-yara-rule-for-a-compromised-certificate/
- https://research.nccgroup.com/2017/09/01/signaturing-an-authenticode-anomaly-with-yara/